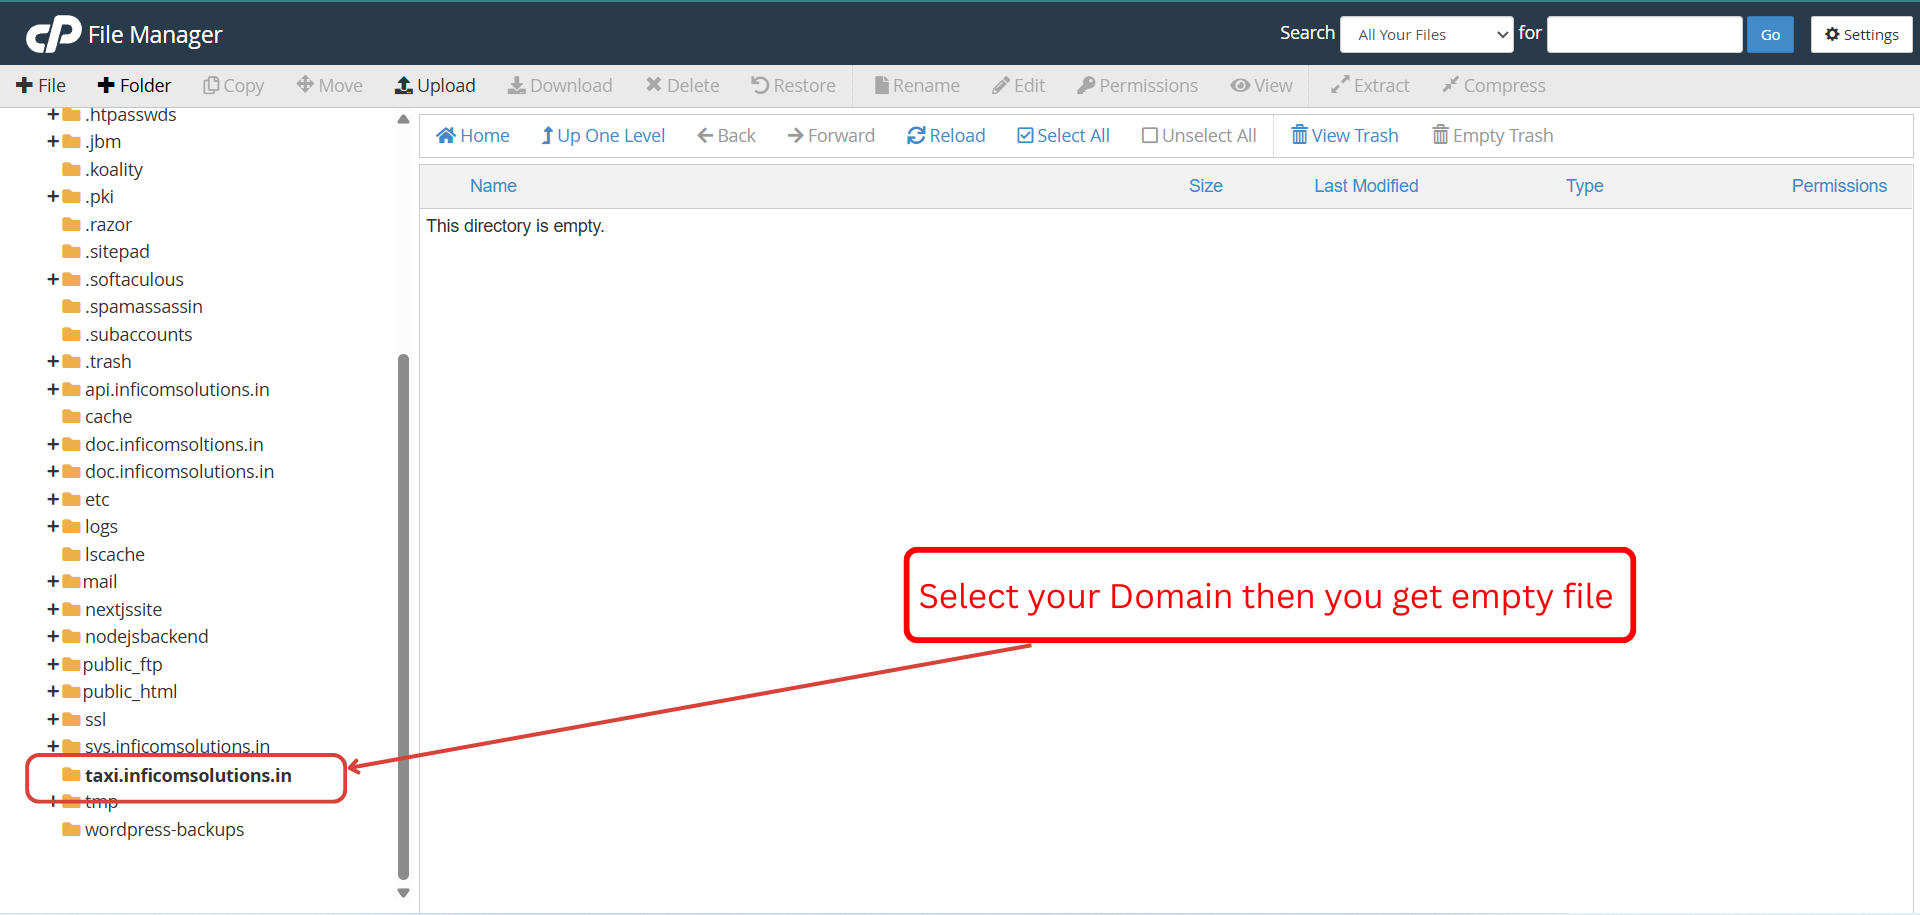
Access Your Domain File Manager
Login to your cPanel account and navigate to the File Manager. Locate your domain's root directory.
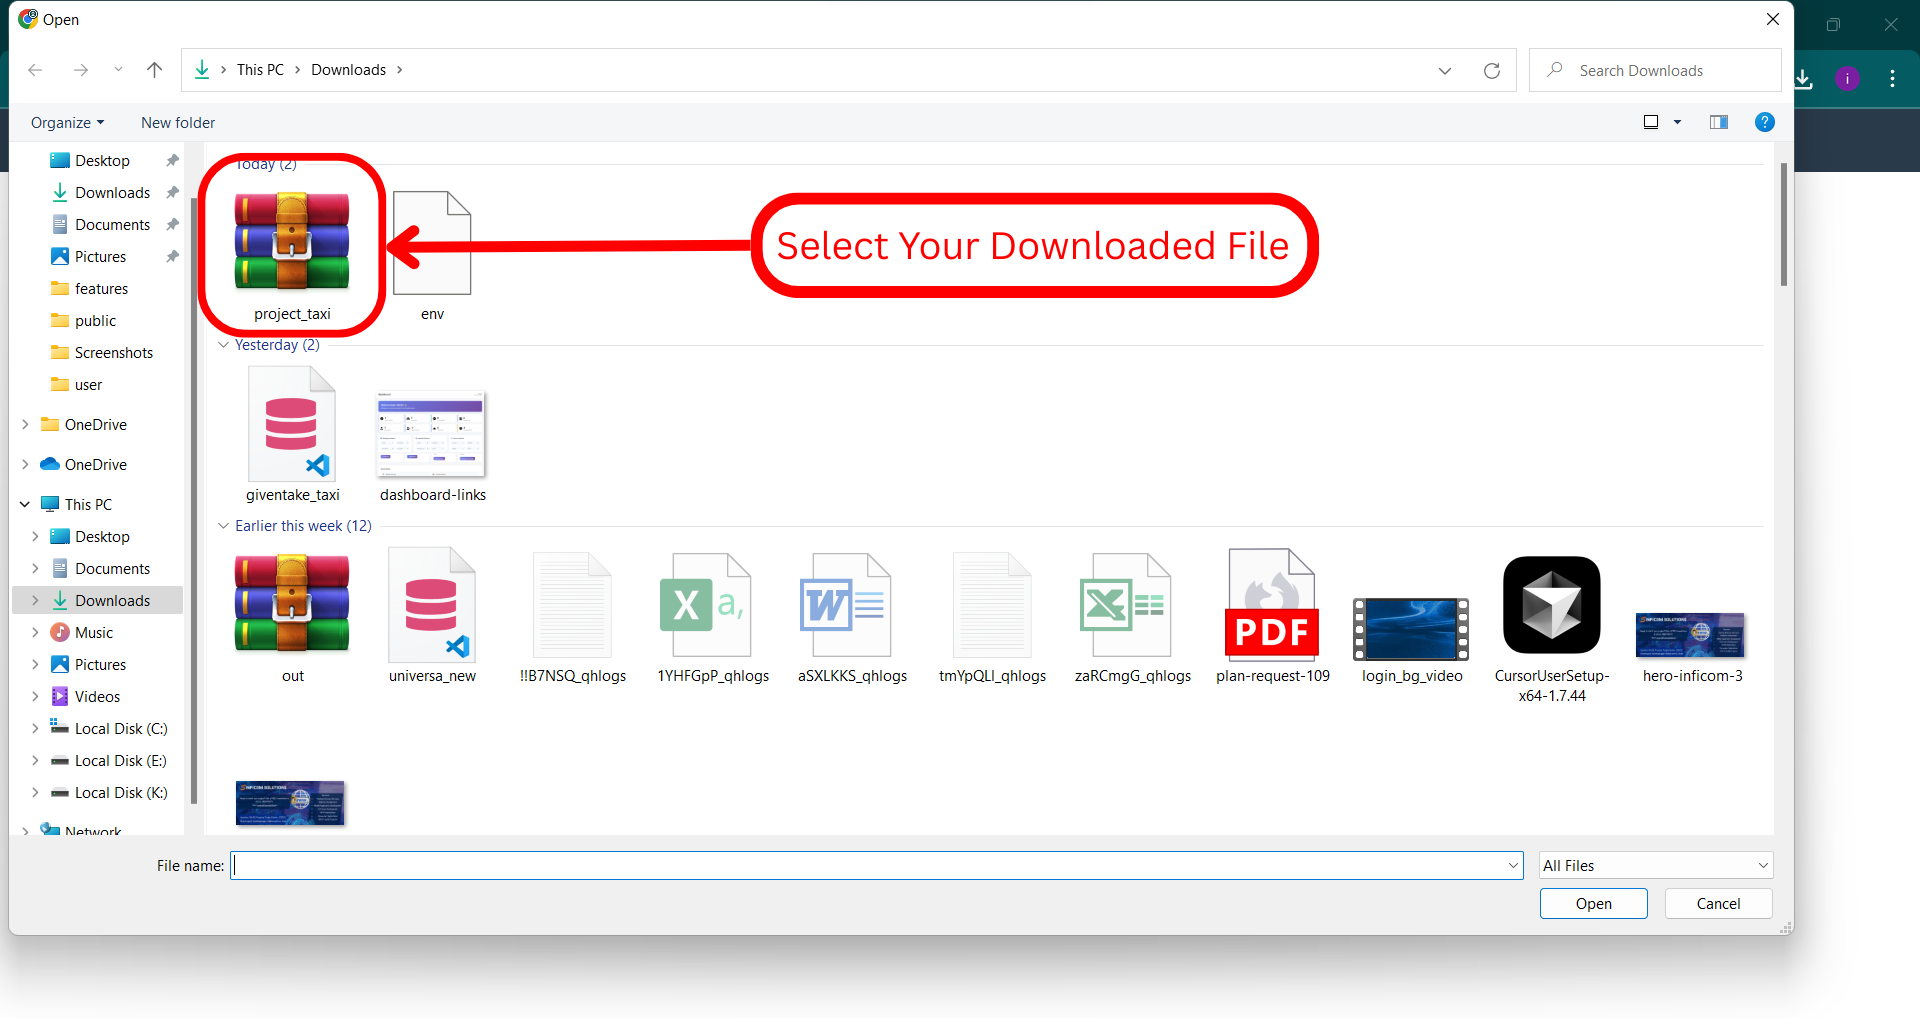
Upload the Application Files
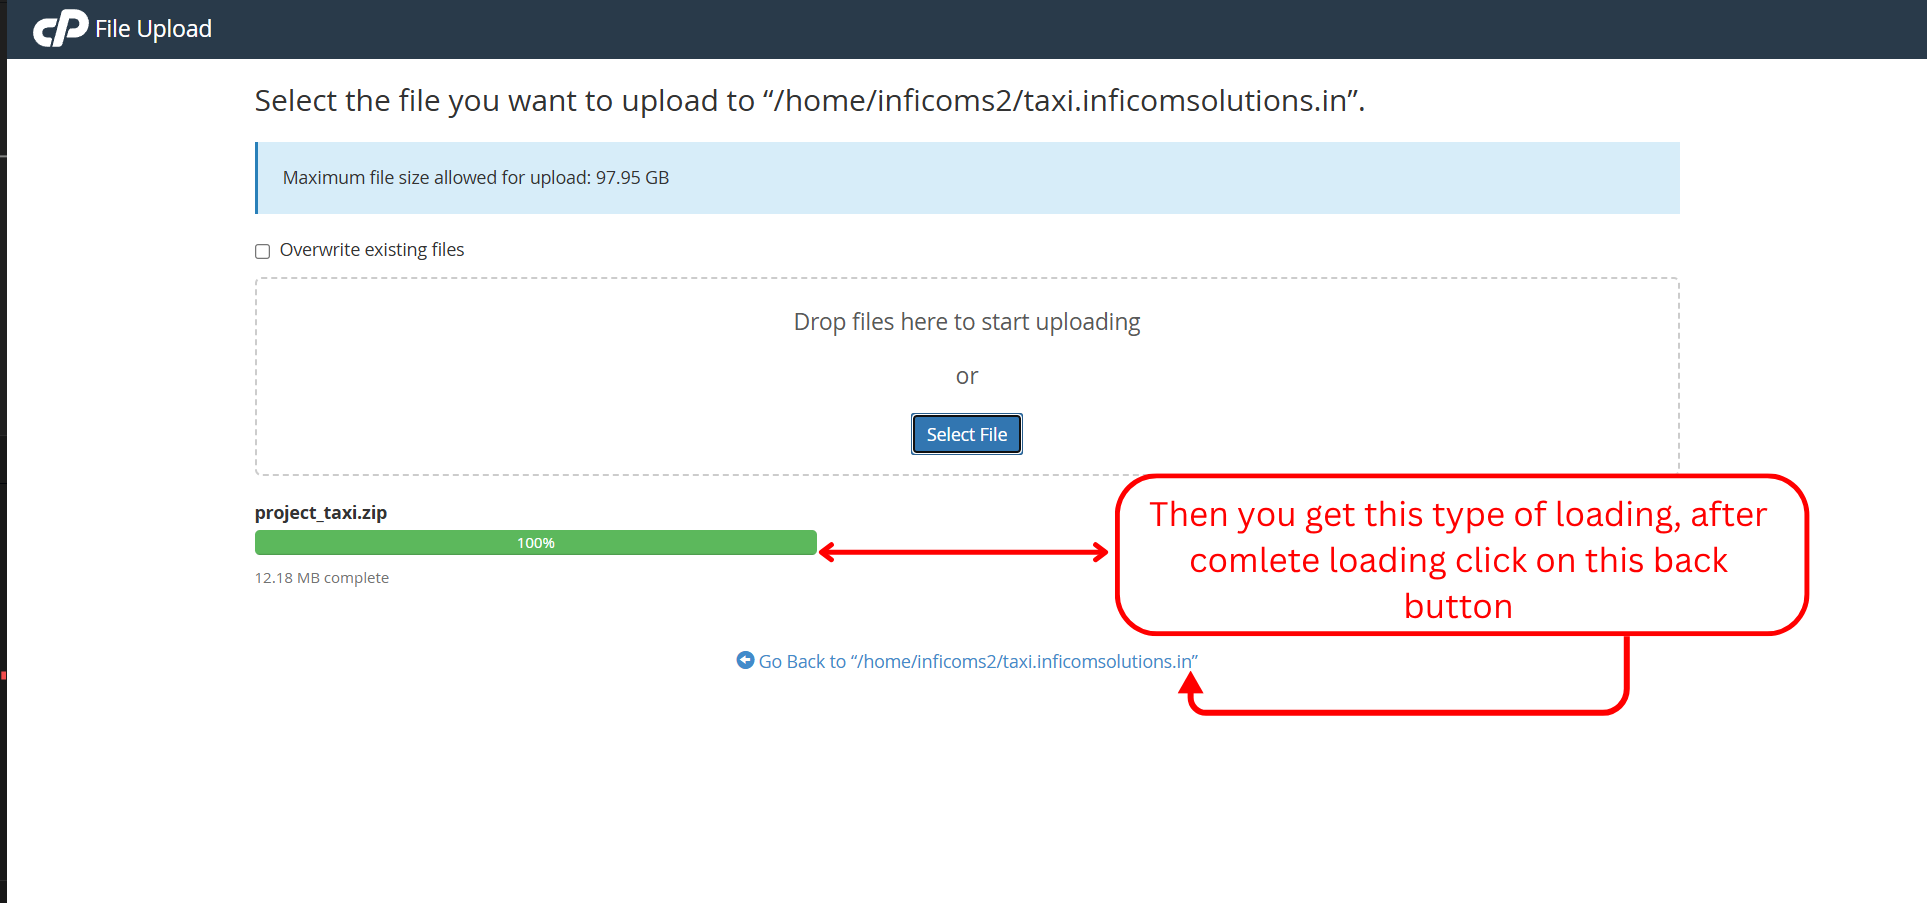
Download the application package and upload it to your domain directory. Use the Upload button in File Manager to transfer the zip file.
Downloaded File
Upload Complete
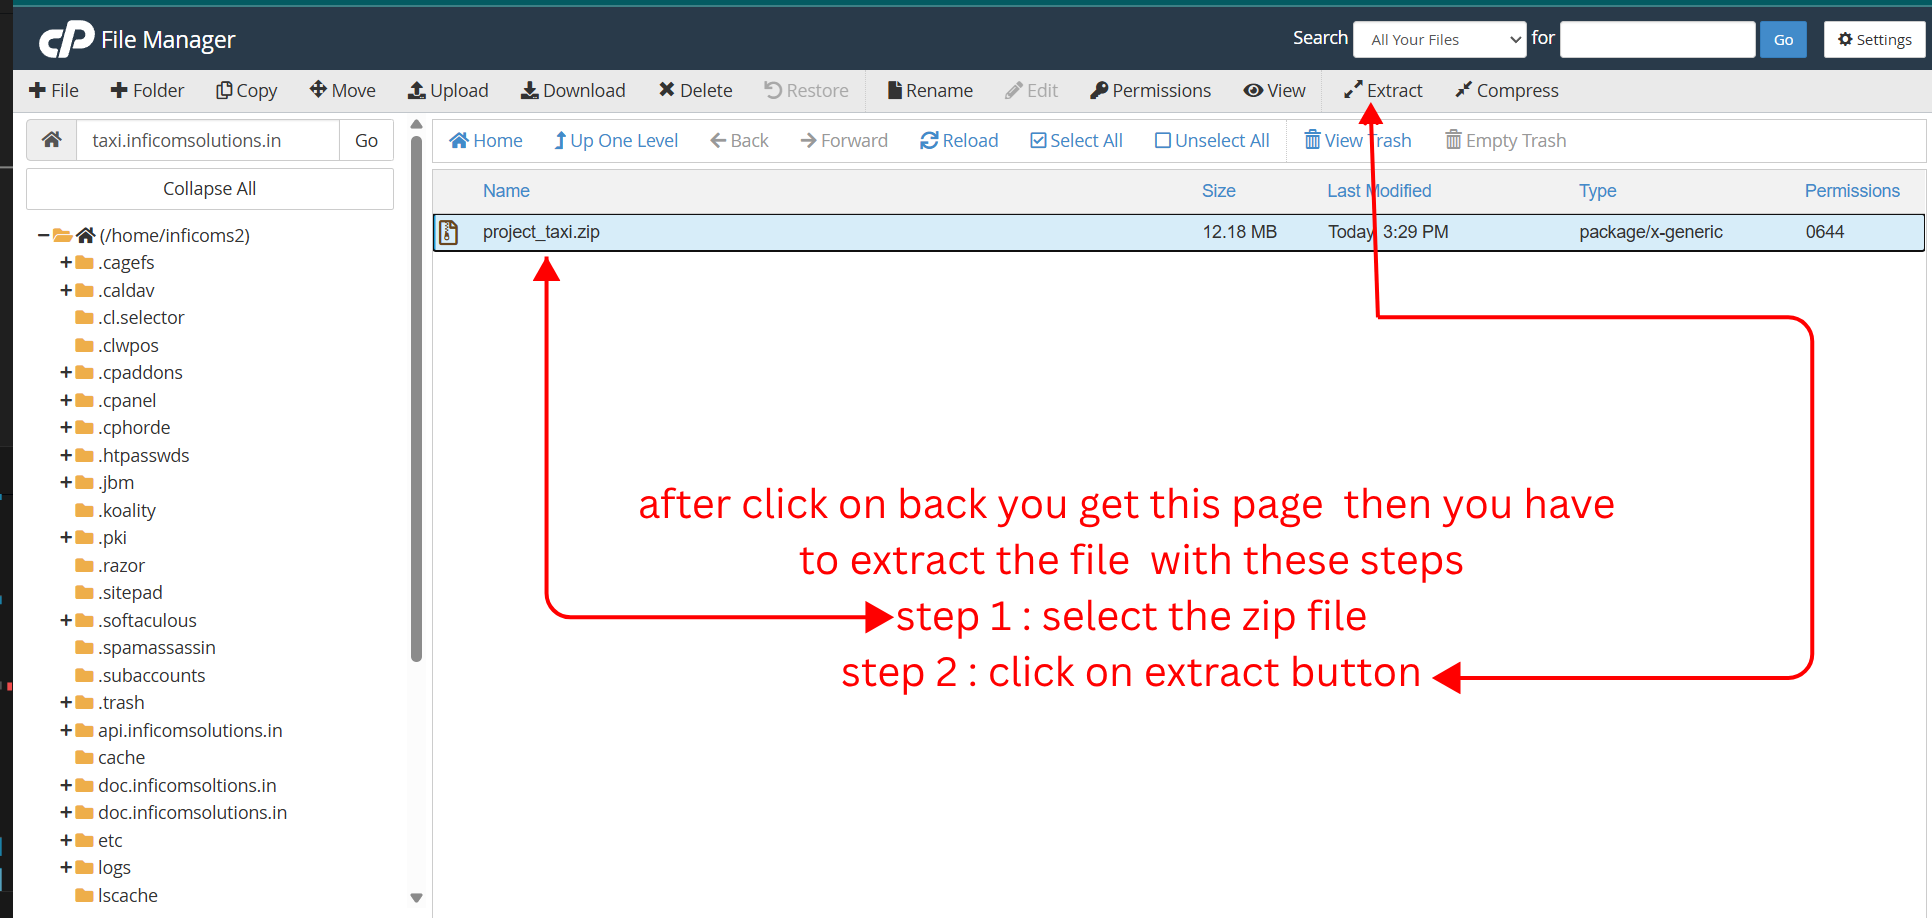
Extract the ZIP File
Click on the uploaded zip file, then click the "Extract" button located at the top-right corner. This will unpack all the application files into your directory.
Configure Environment File
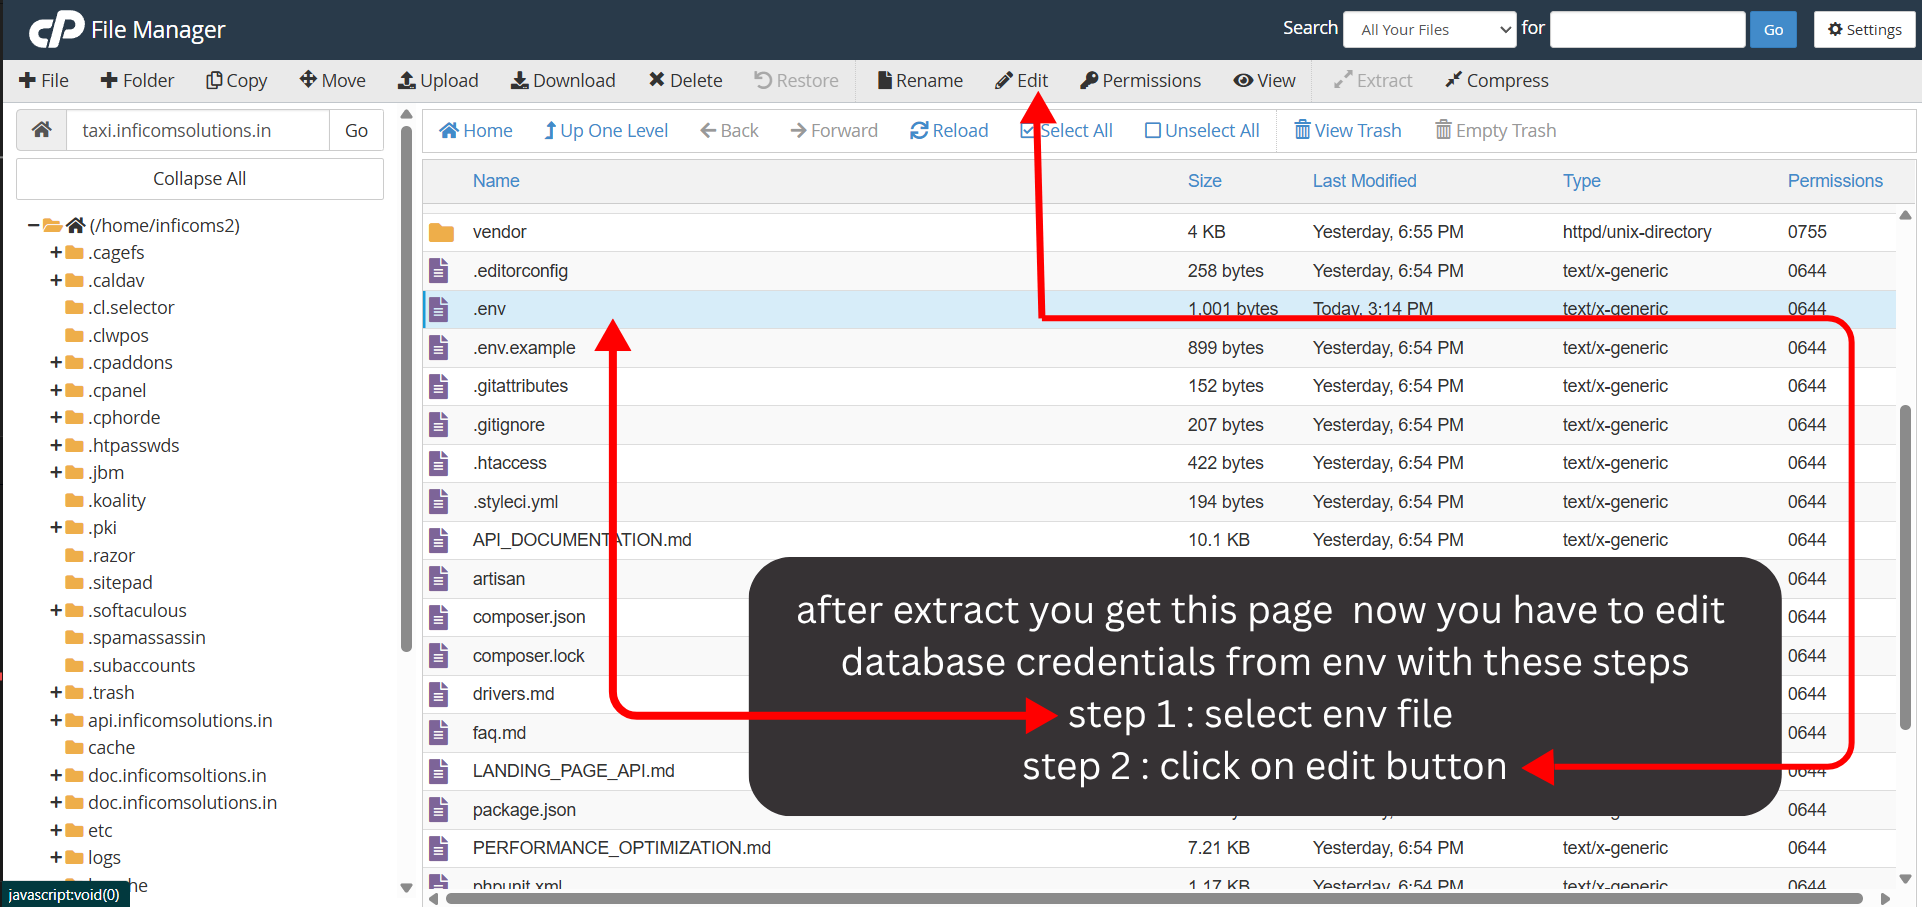
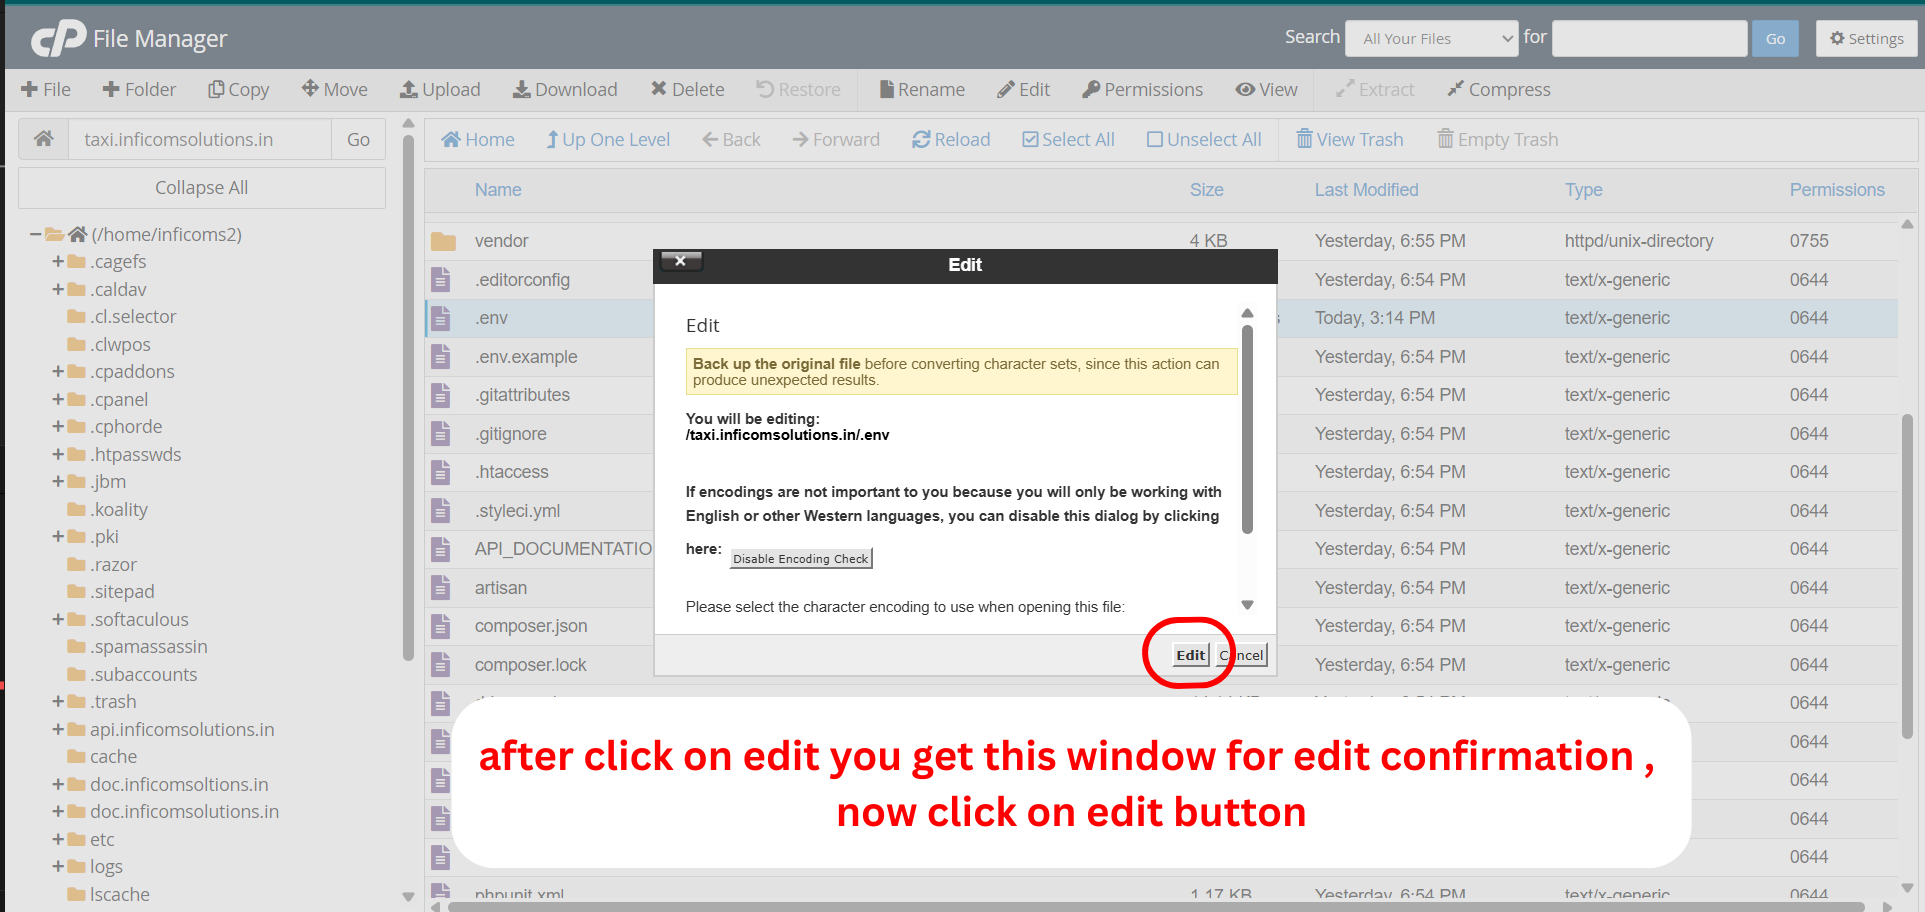
Click on the extracted .env file to select it, then click the "Edit" button at the top center. This will allow you to configure your database and other settings.
Locate .env File
Edit Permissions
Edit Environment Configuration
Open the .env file in the editor and update your database credentials, application URL, and other configuration settings. Save the changes when done.
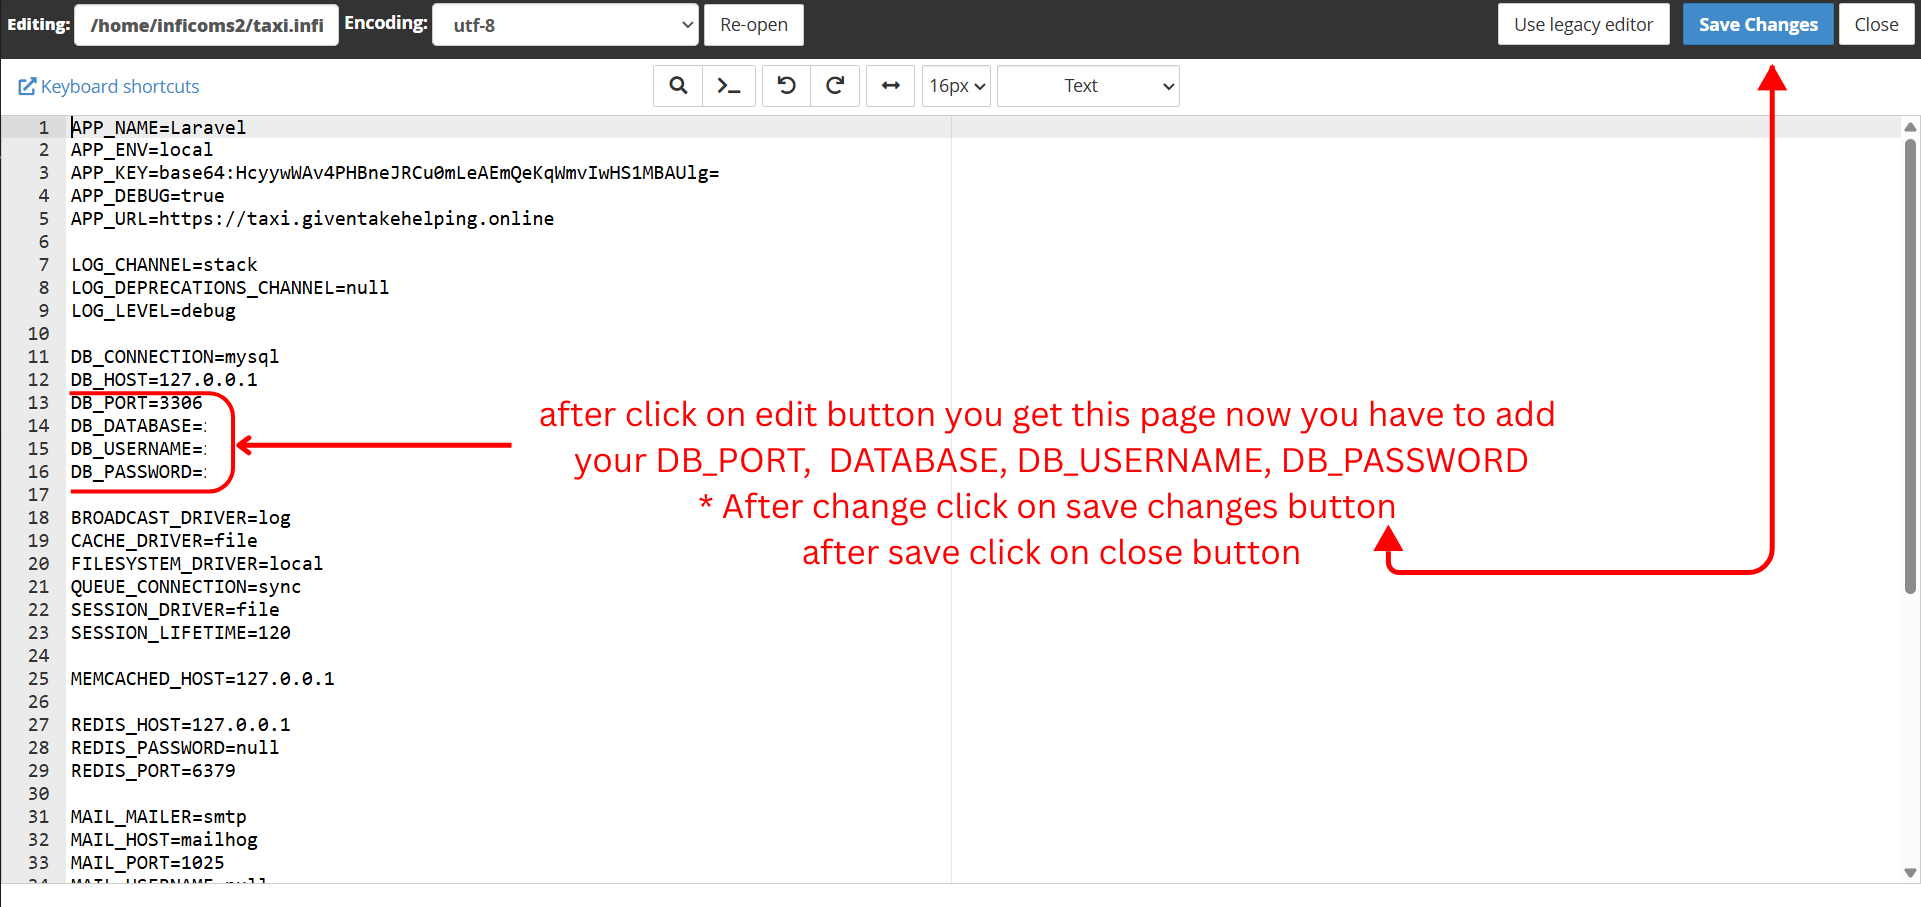
Important Configuration Settings:
- •DB_HOST: Your database host (usually localhost)
- •DB_DATABASE: Your database name
- •DB_USERNAME: Your database username
- •DB_PASSWORD: Your database password
Installation Complete!
Congratulations! Your Taxi Platform has been successfully installed and configured. The application is now ready to run.
Next Steps:
- 1Visit your website URL to see the application running
- 2Access the admin panel at
yourdomain.com/admin - 3Login with default credentials and change your password
- 4Start managing your website content, vehicles, bookings, and settings from the admin panel